Creating Japanese scrolls
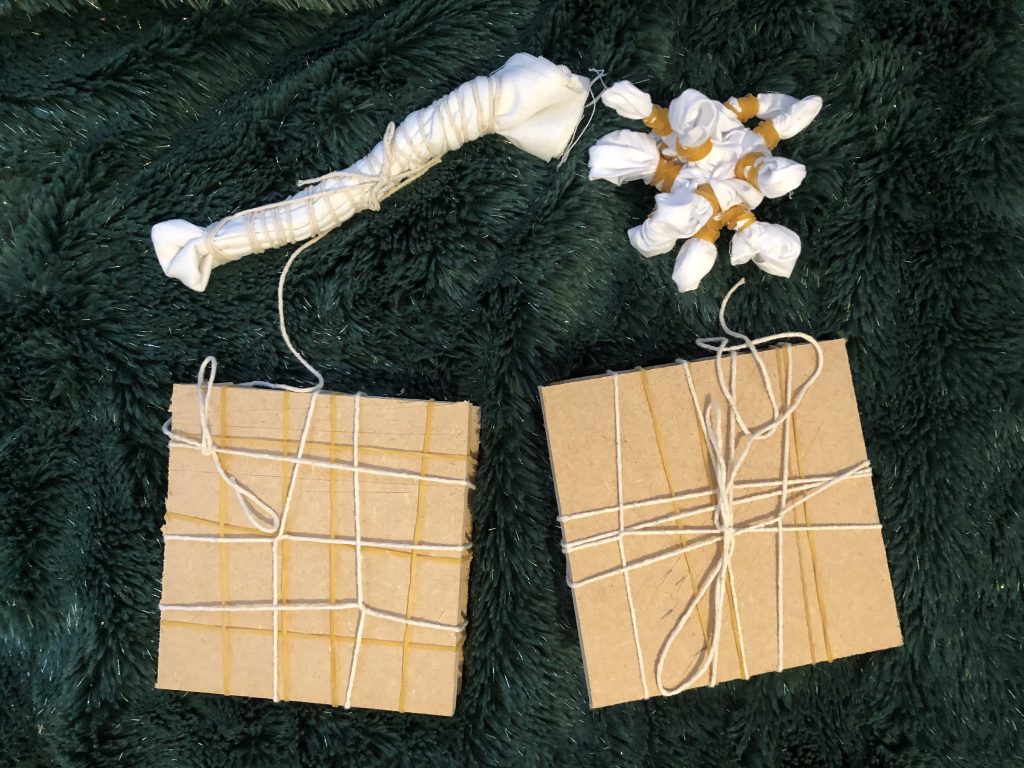
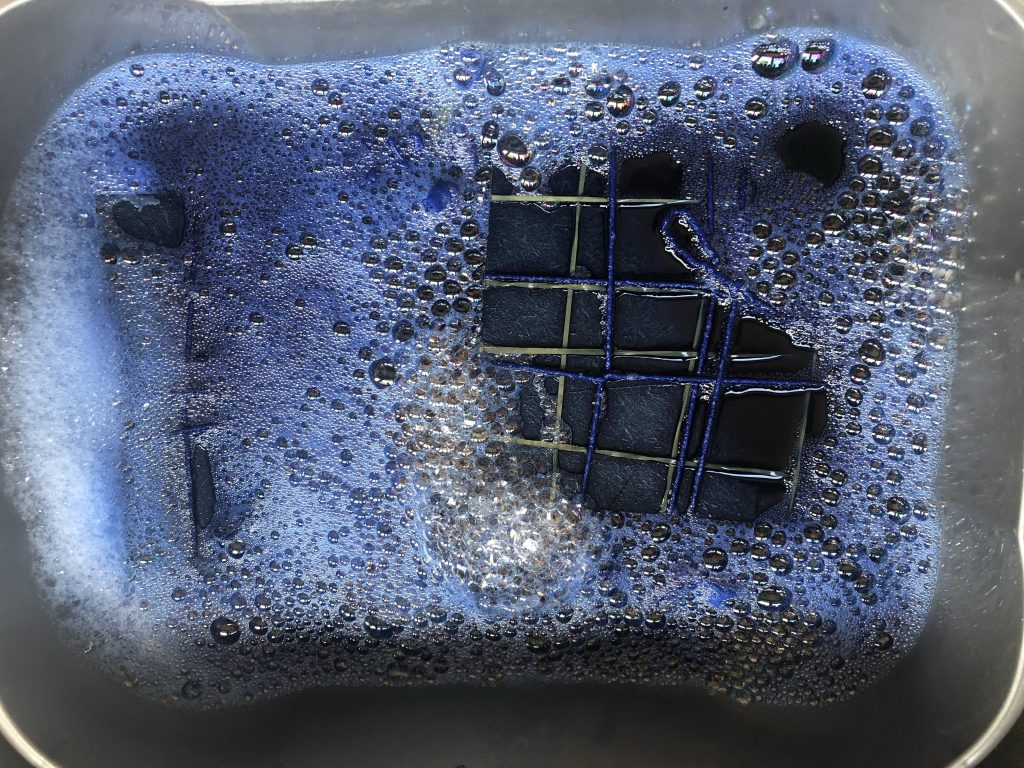
The firs type of Japanese scroll that I am creating is a modern version which is hung vertical on a string. I have decided to do shibori for these scrolls. I have chosen to do this as Shibori is a Japanese tie dye and I found it so intriguing when I was experimenting with it.
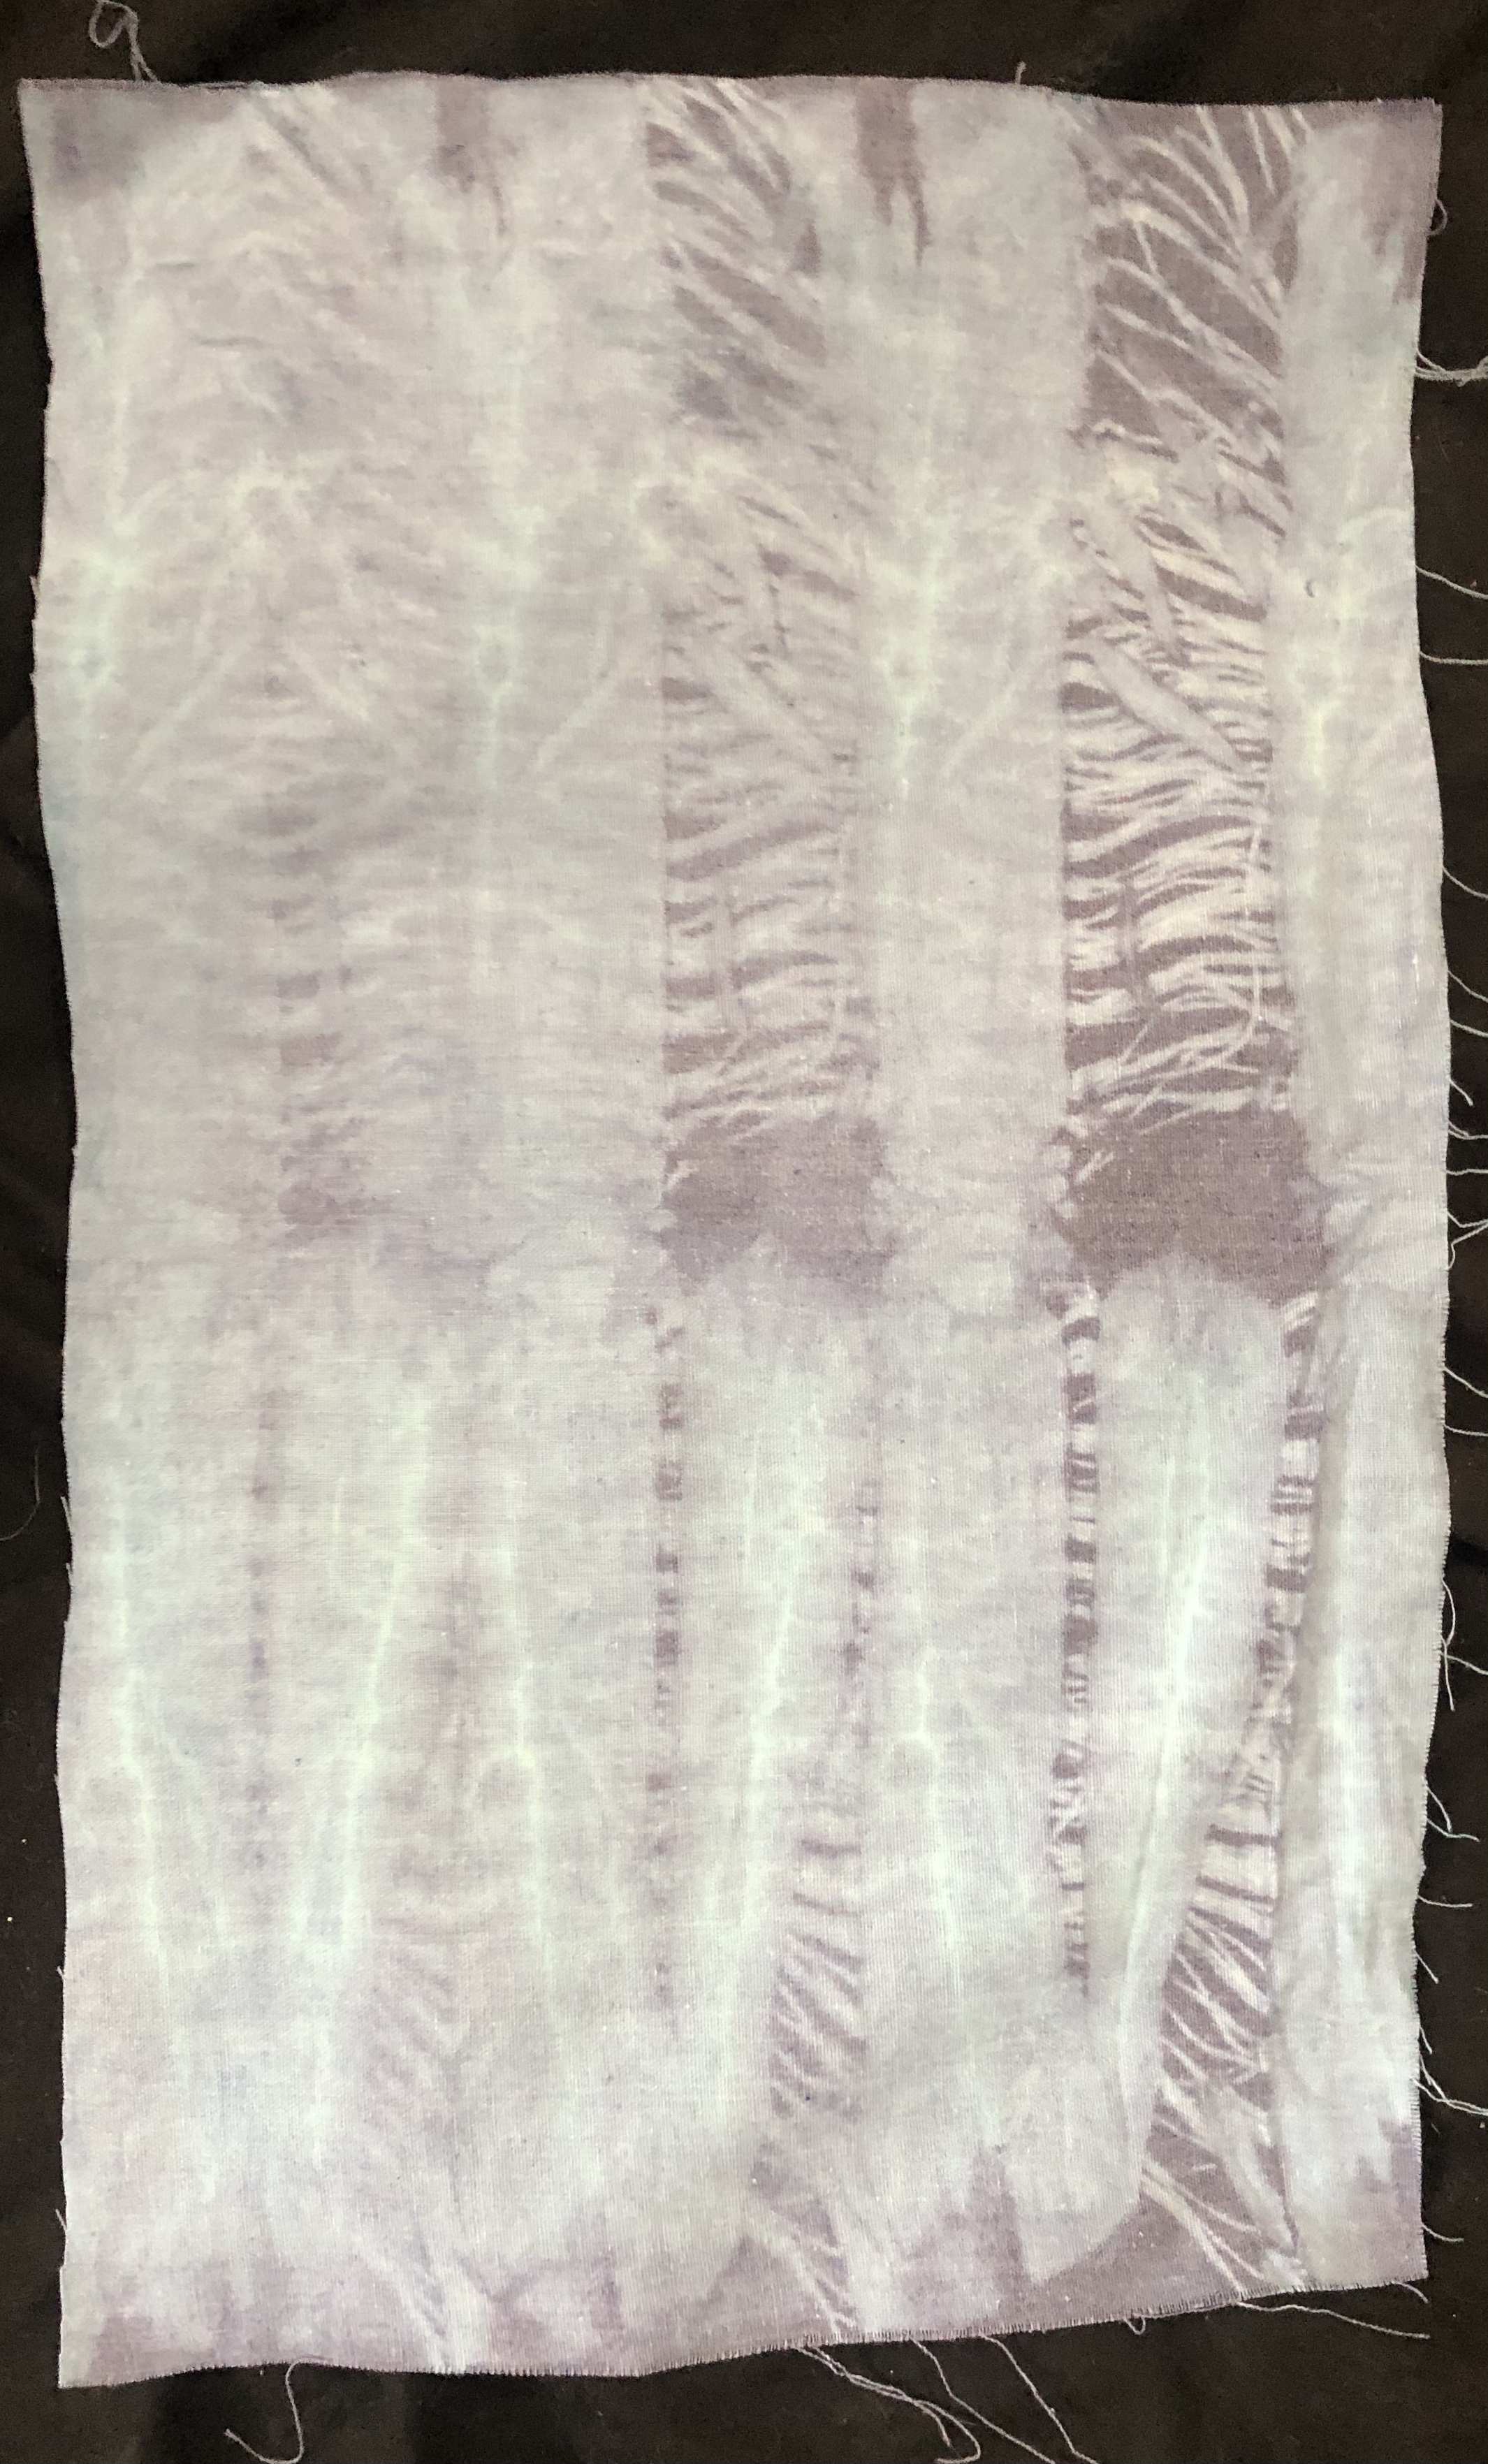
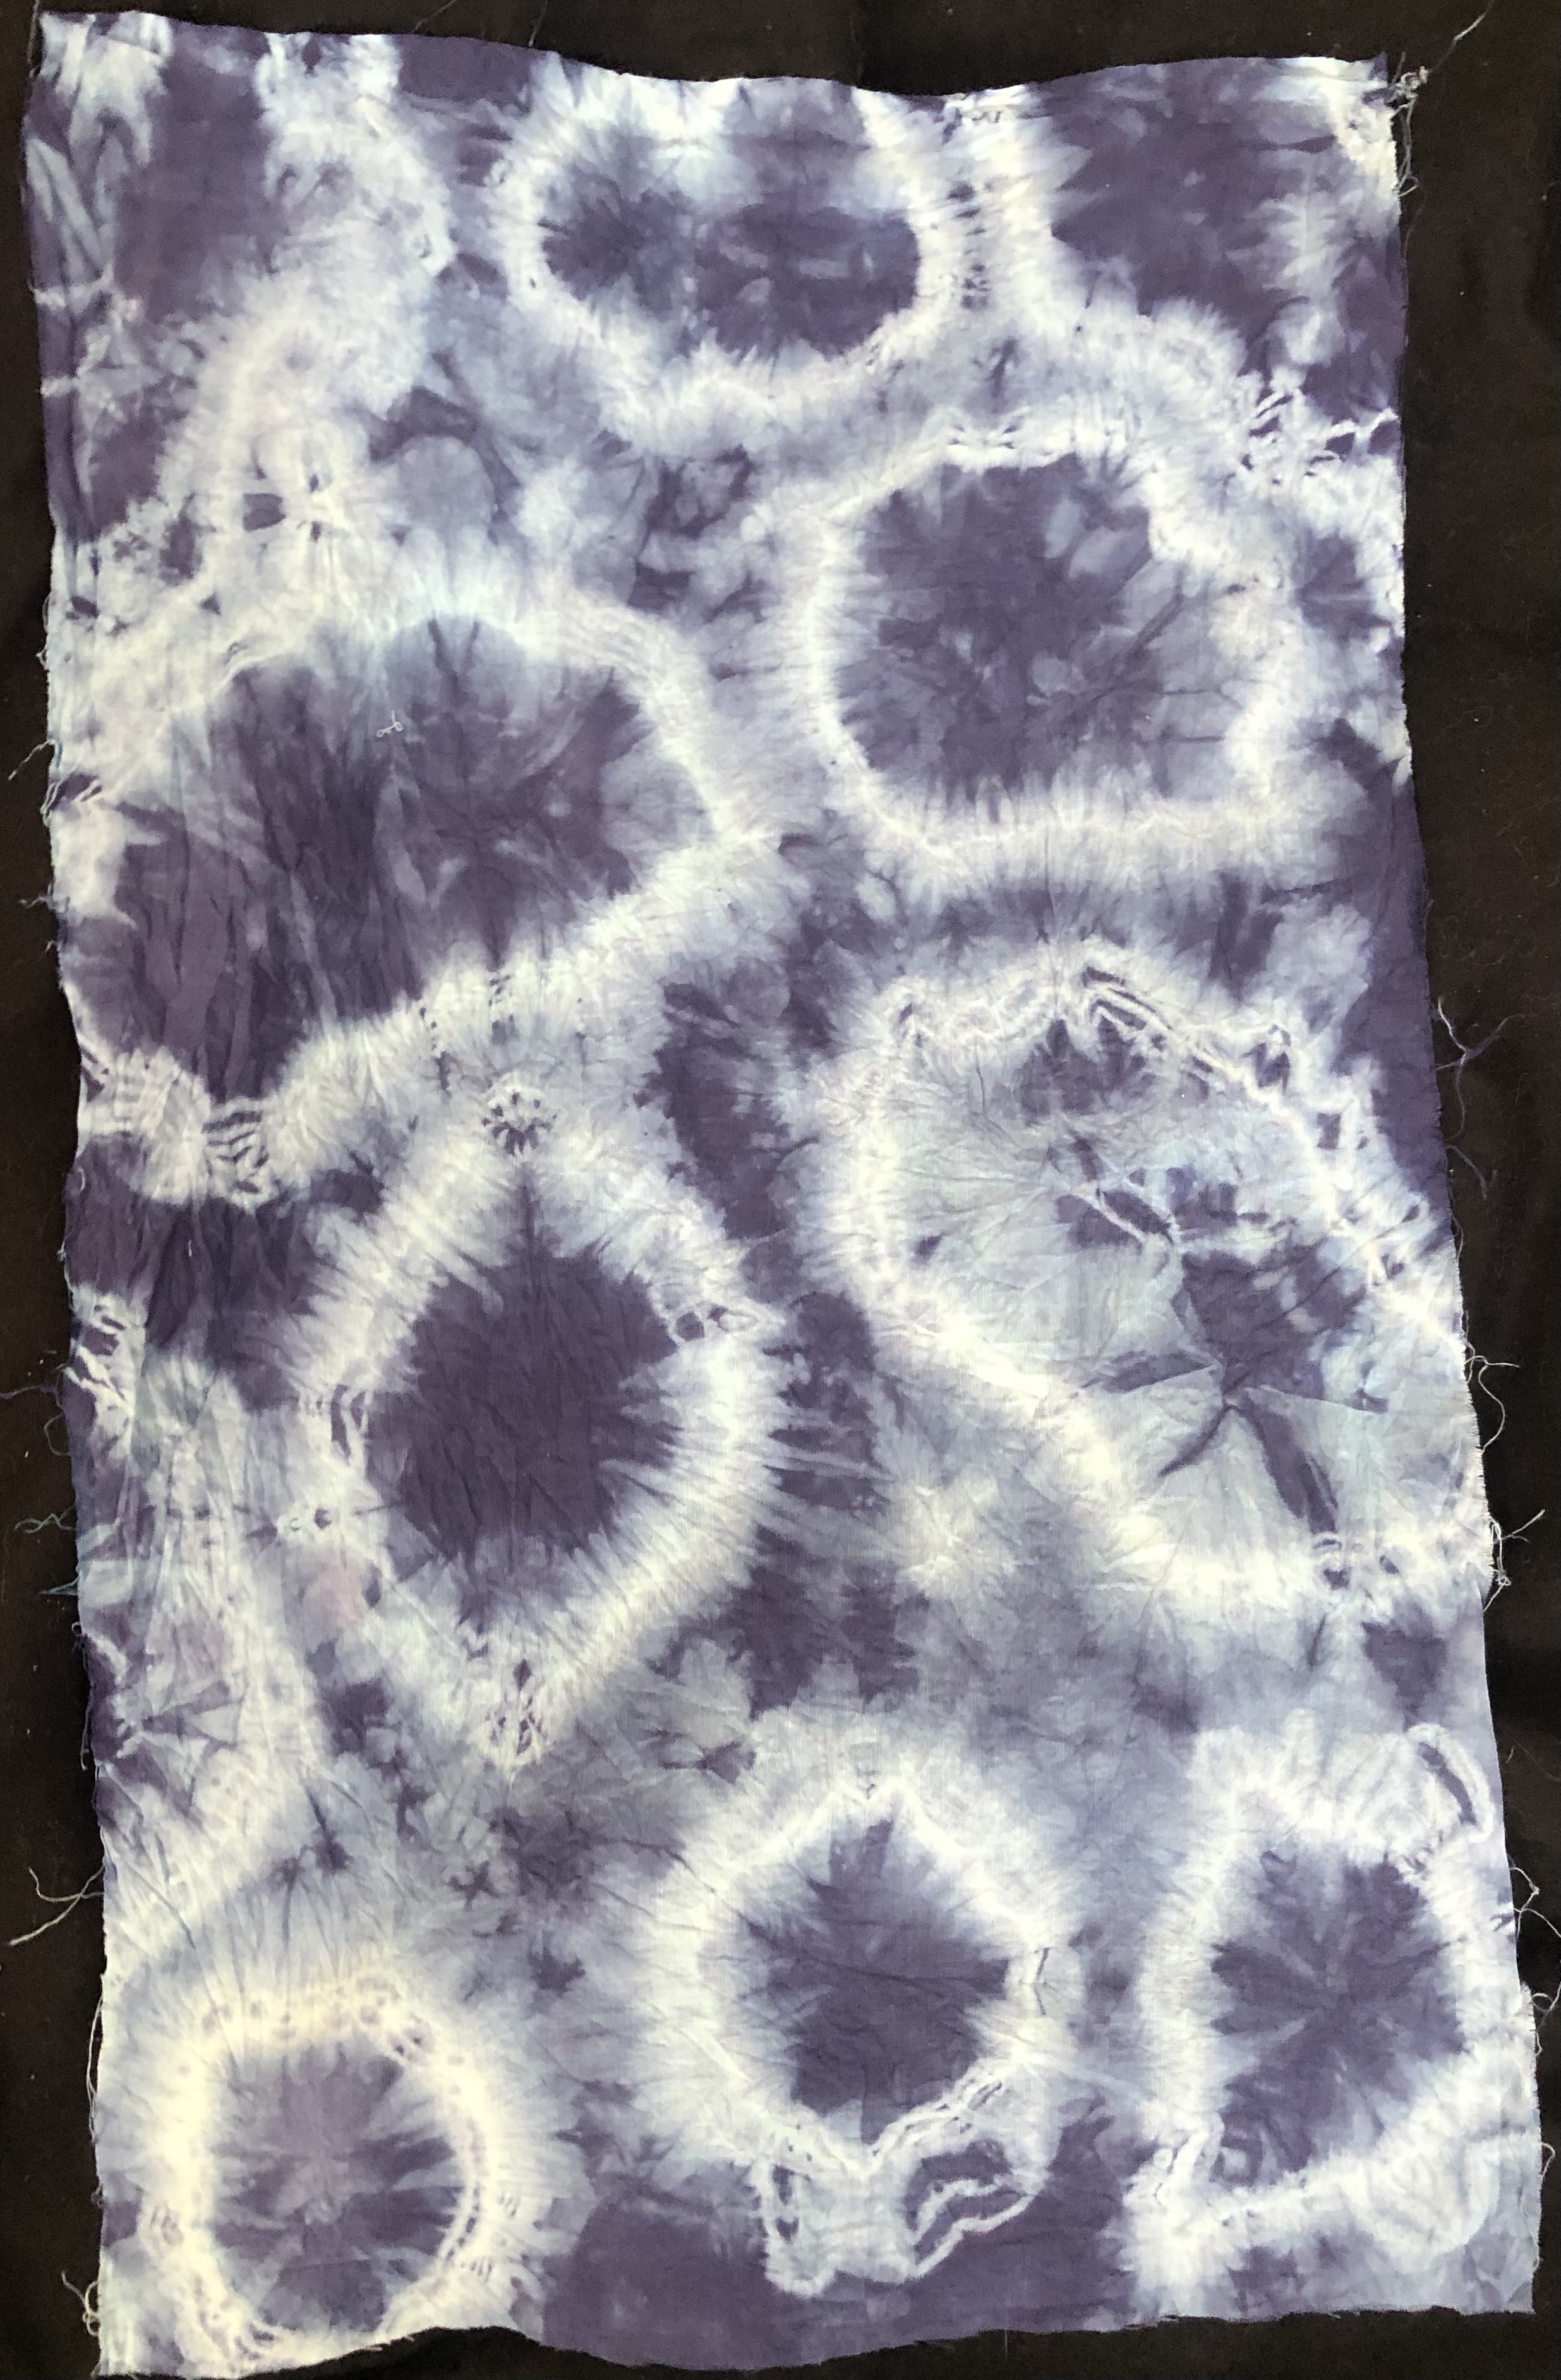
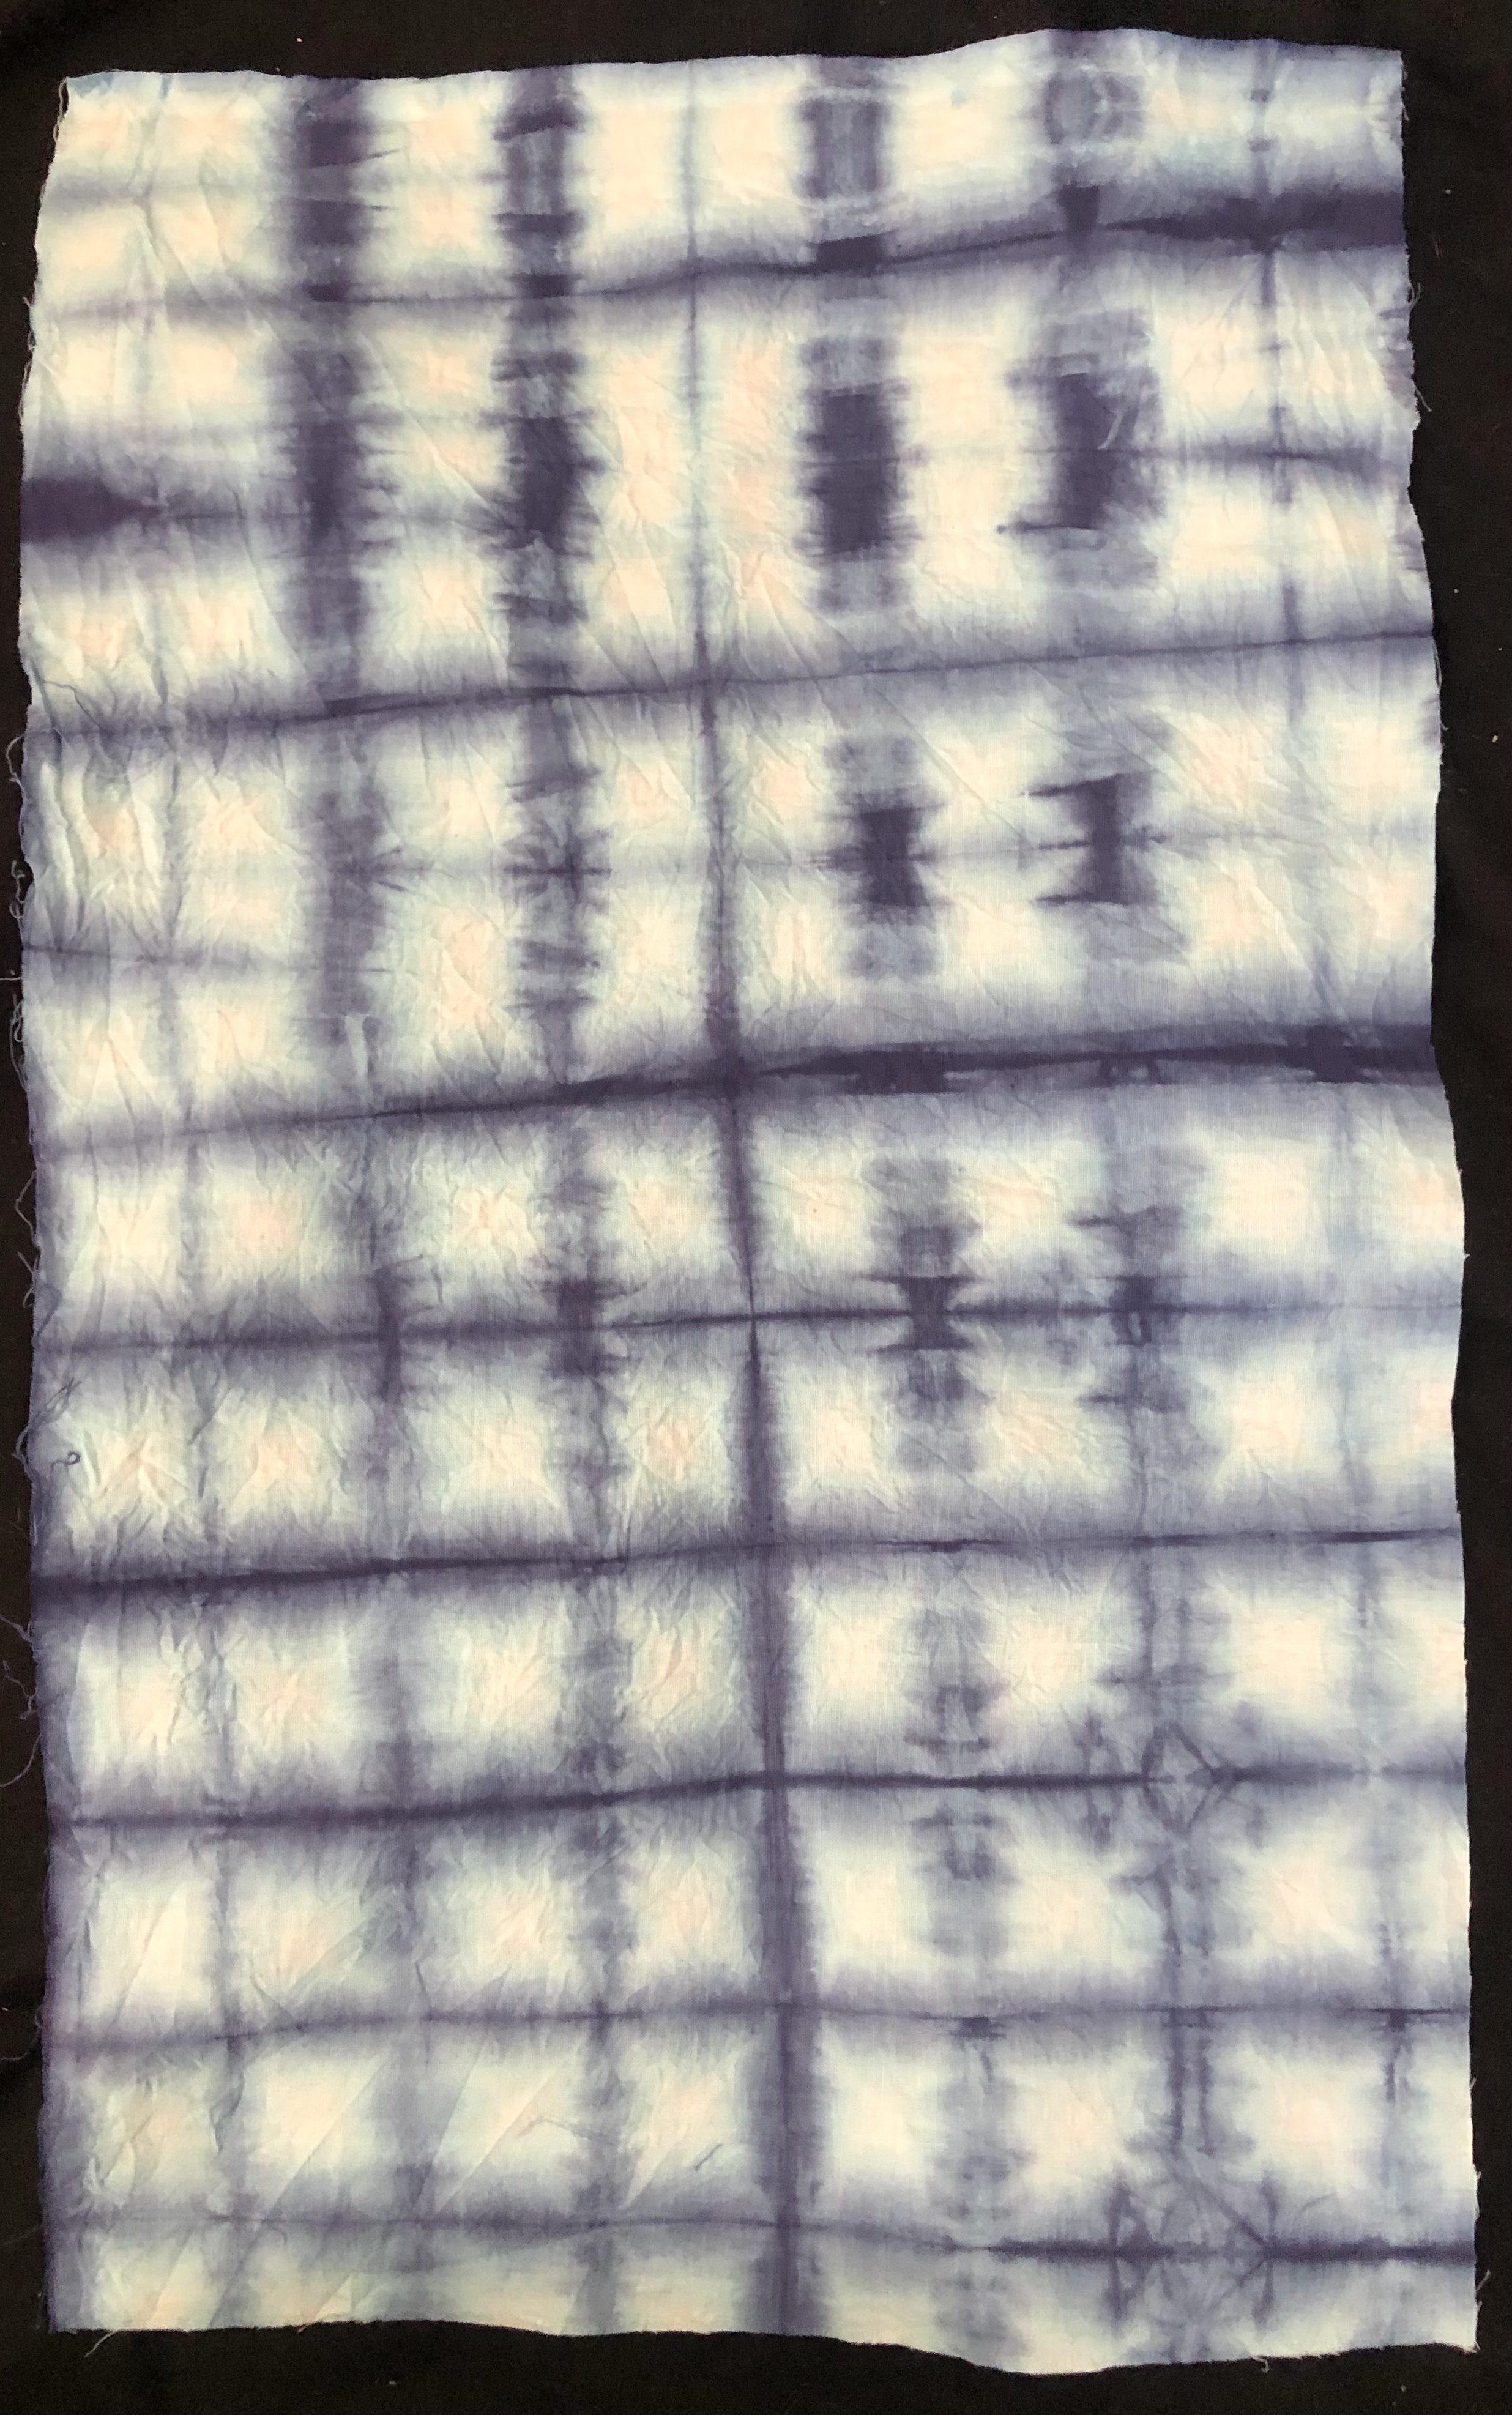
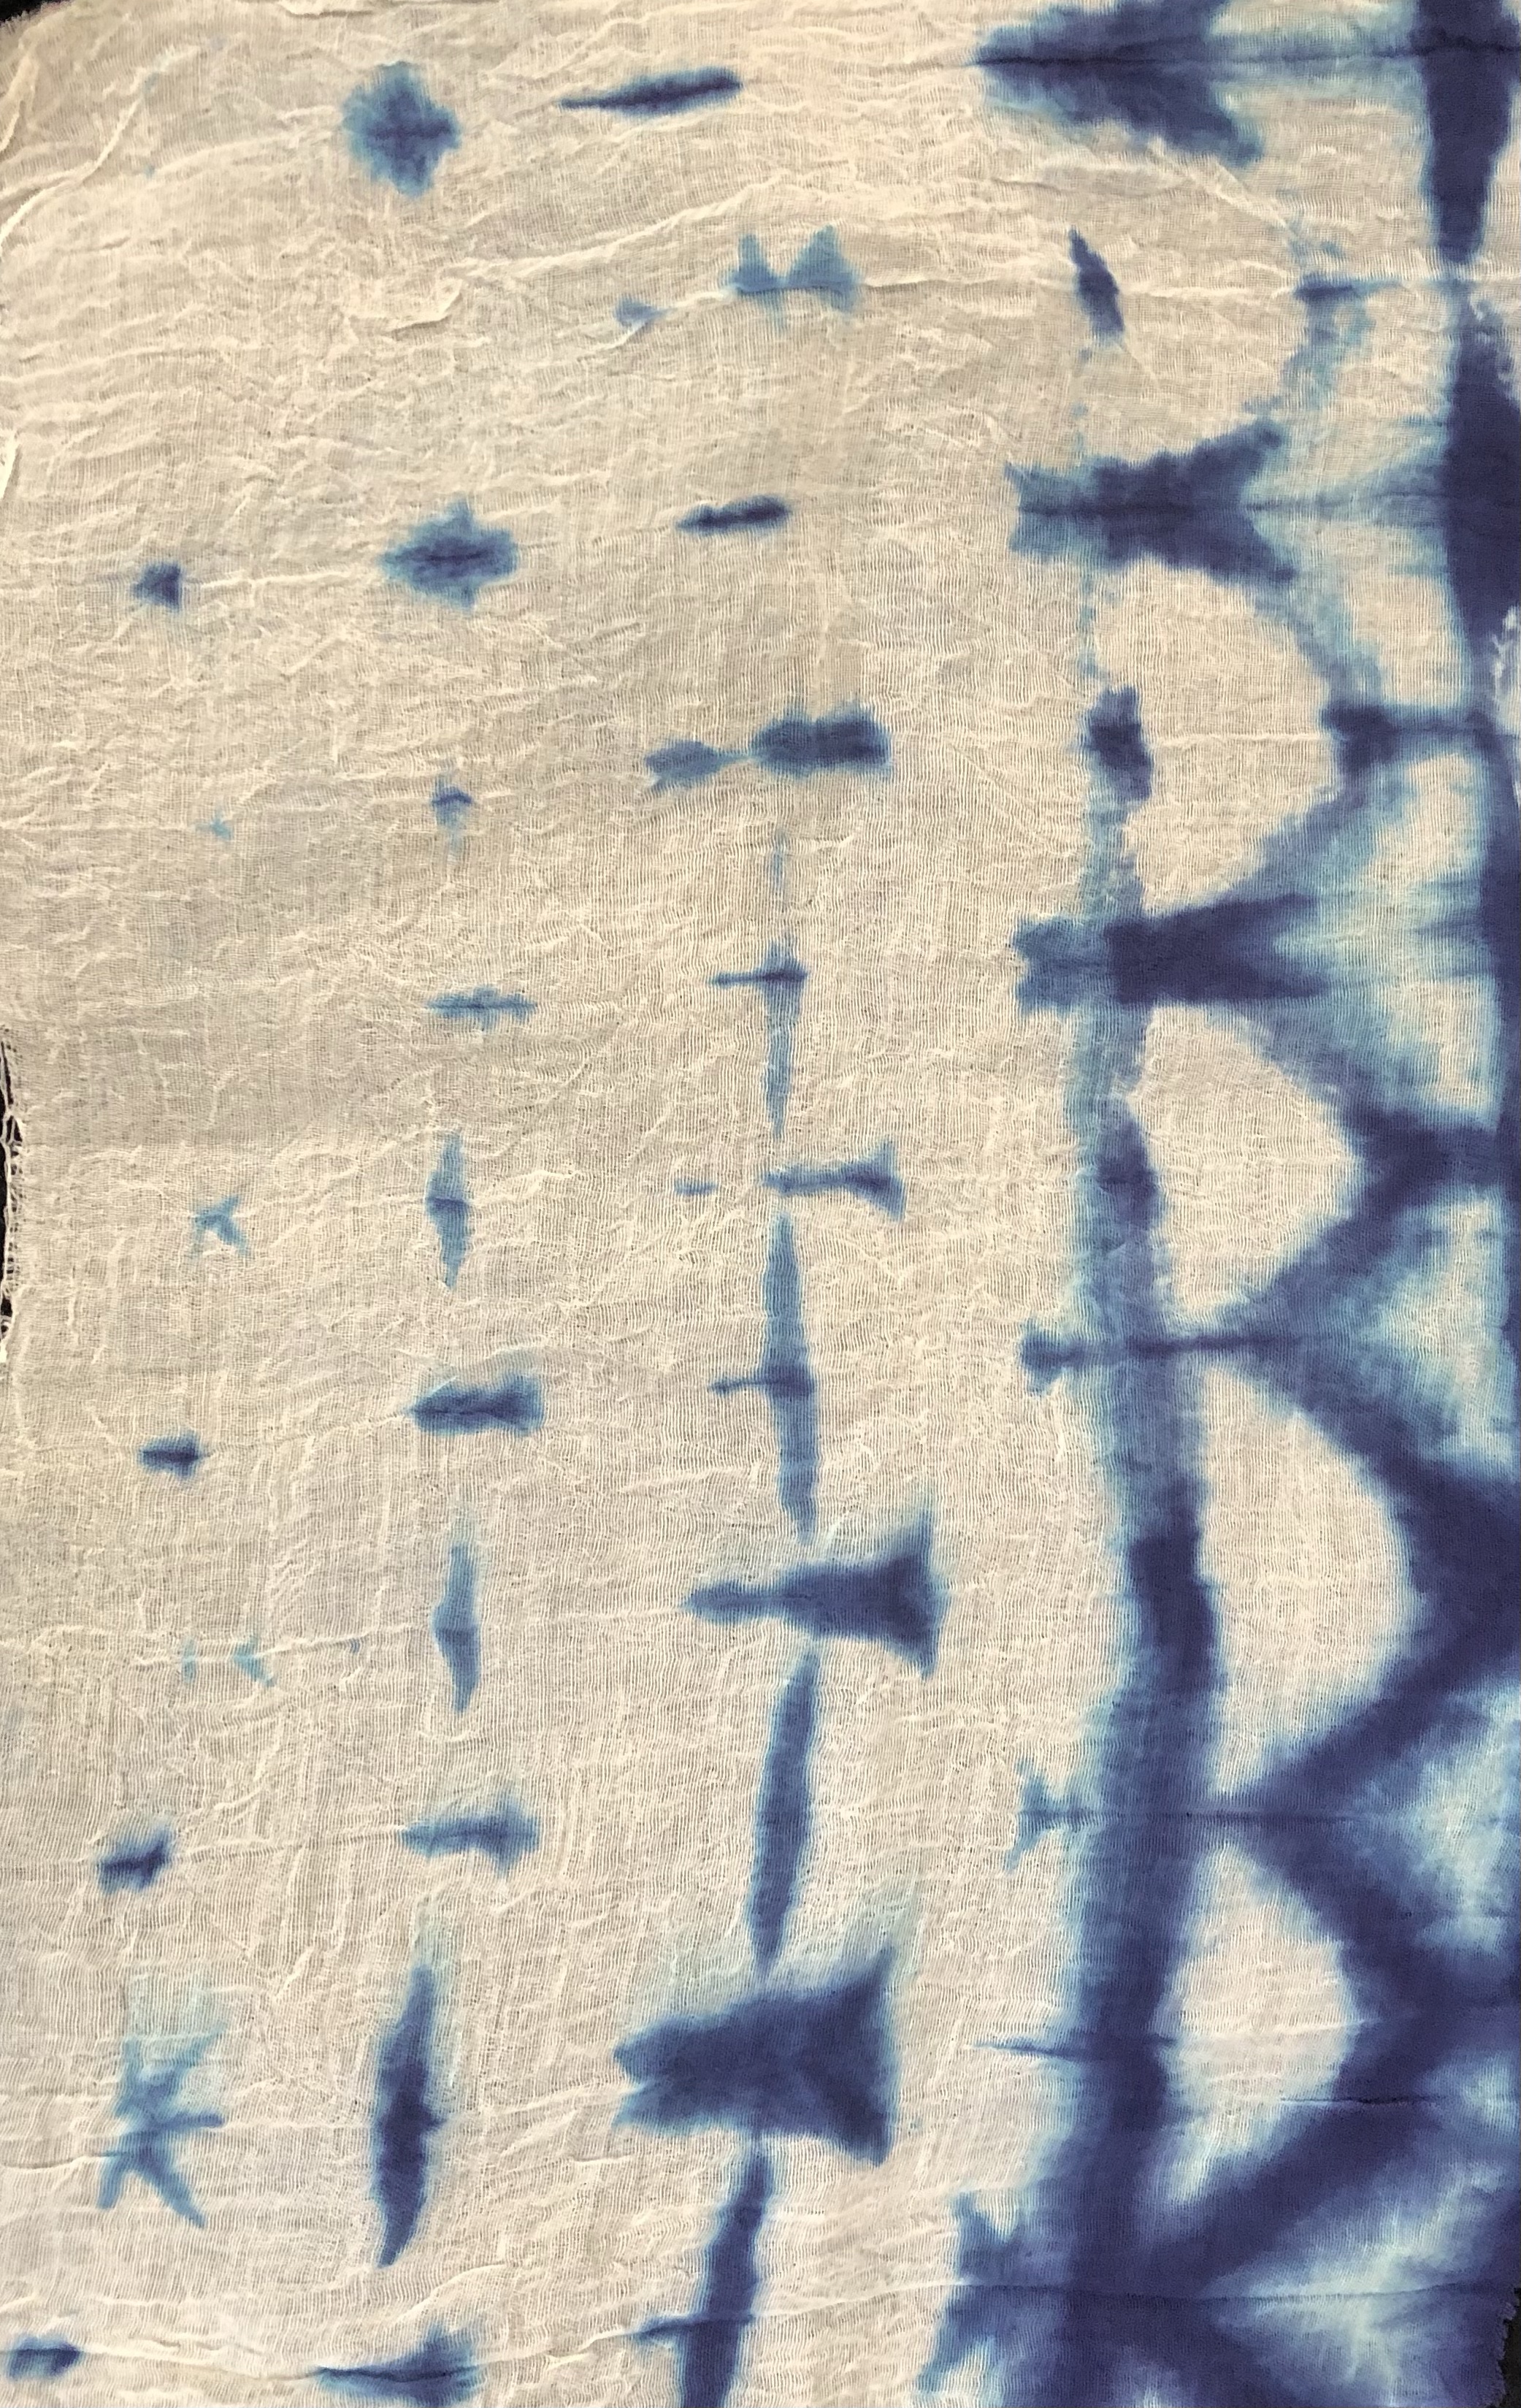
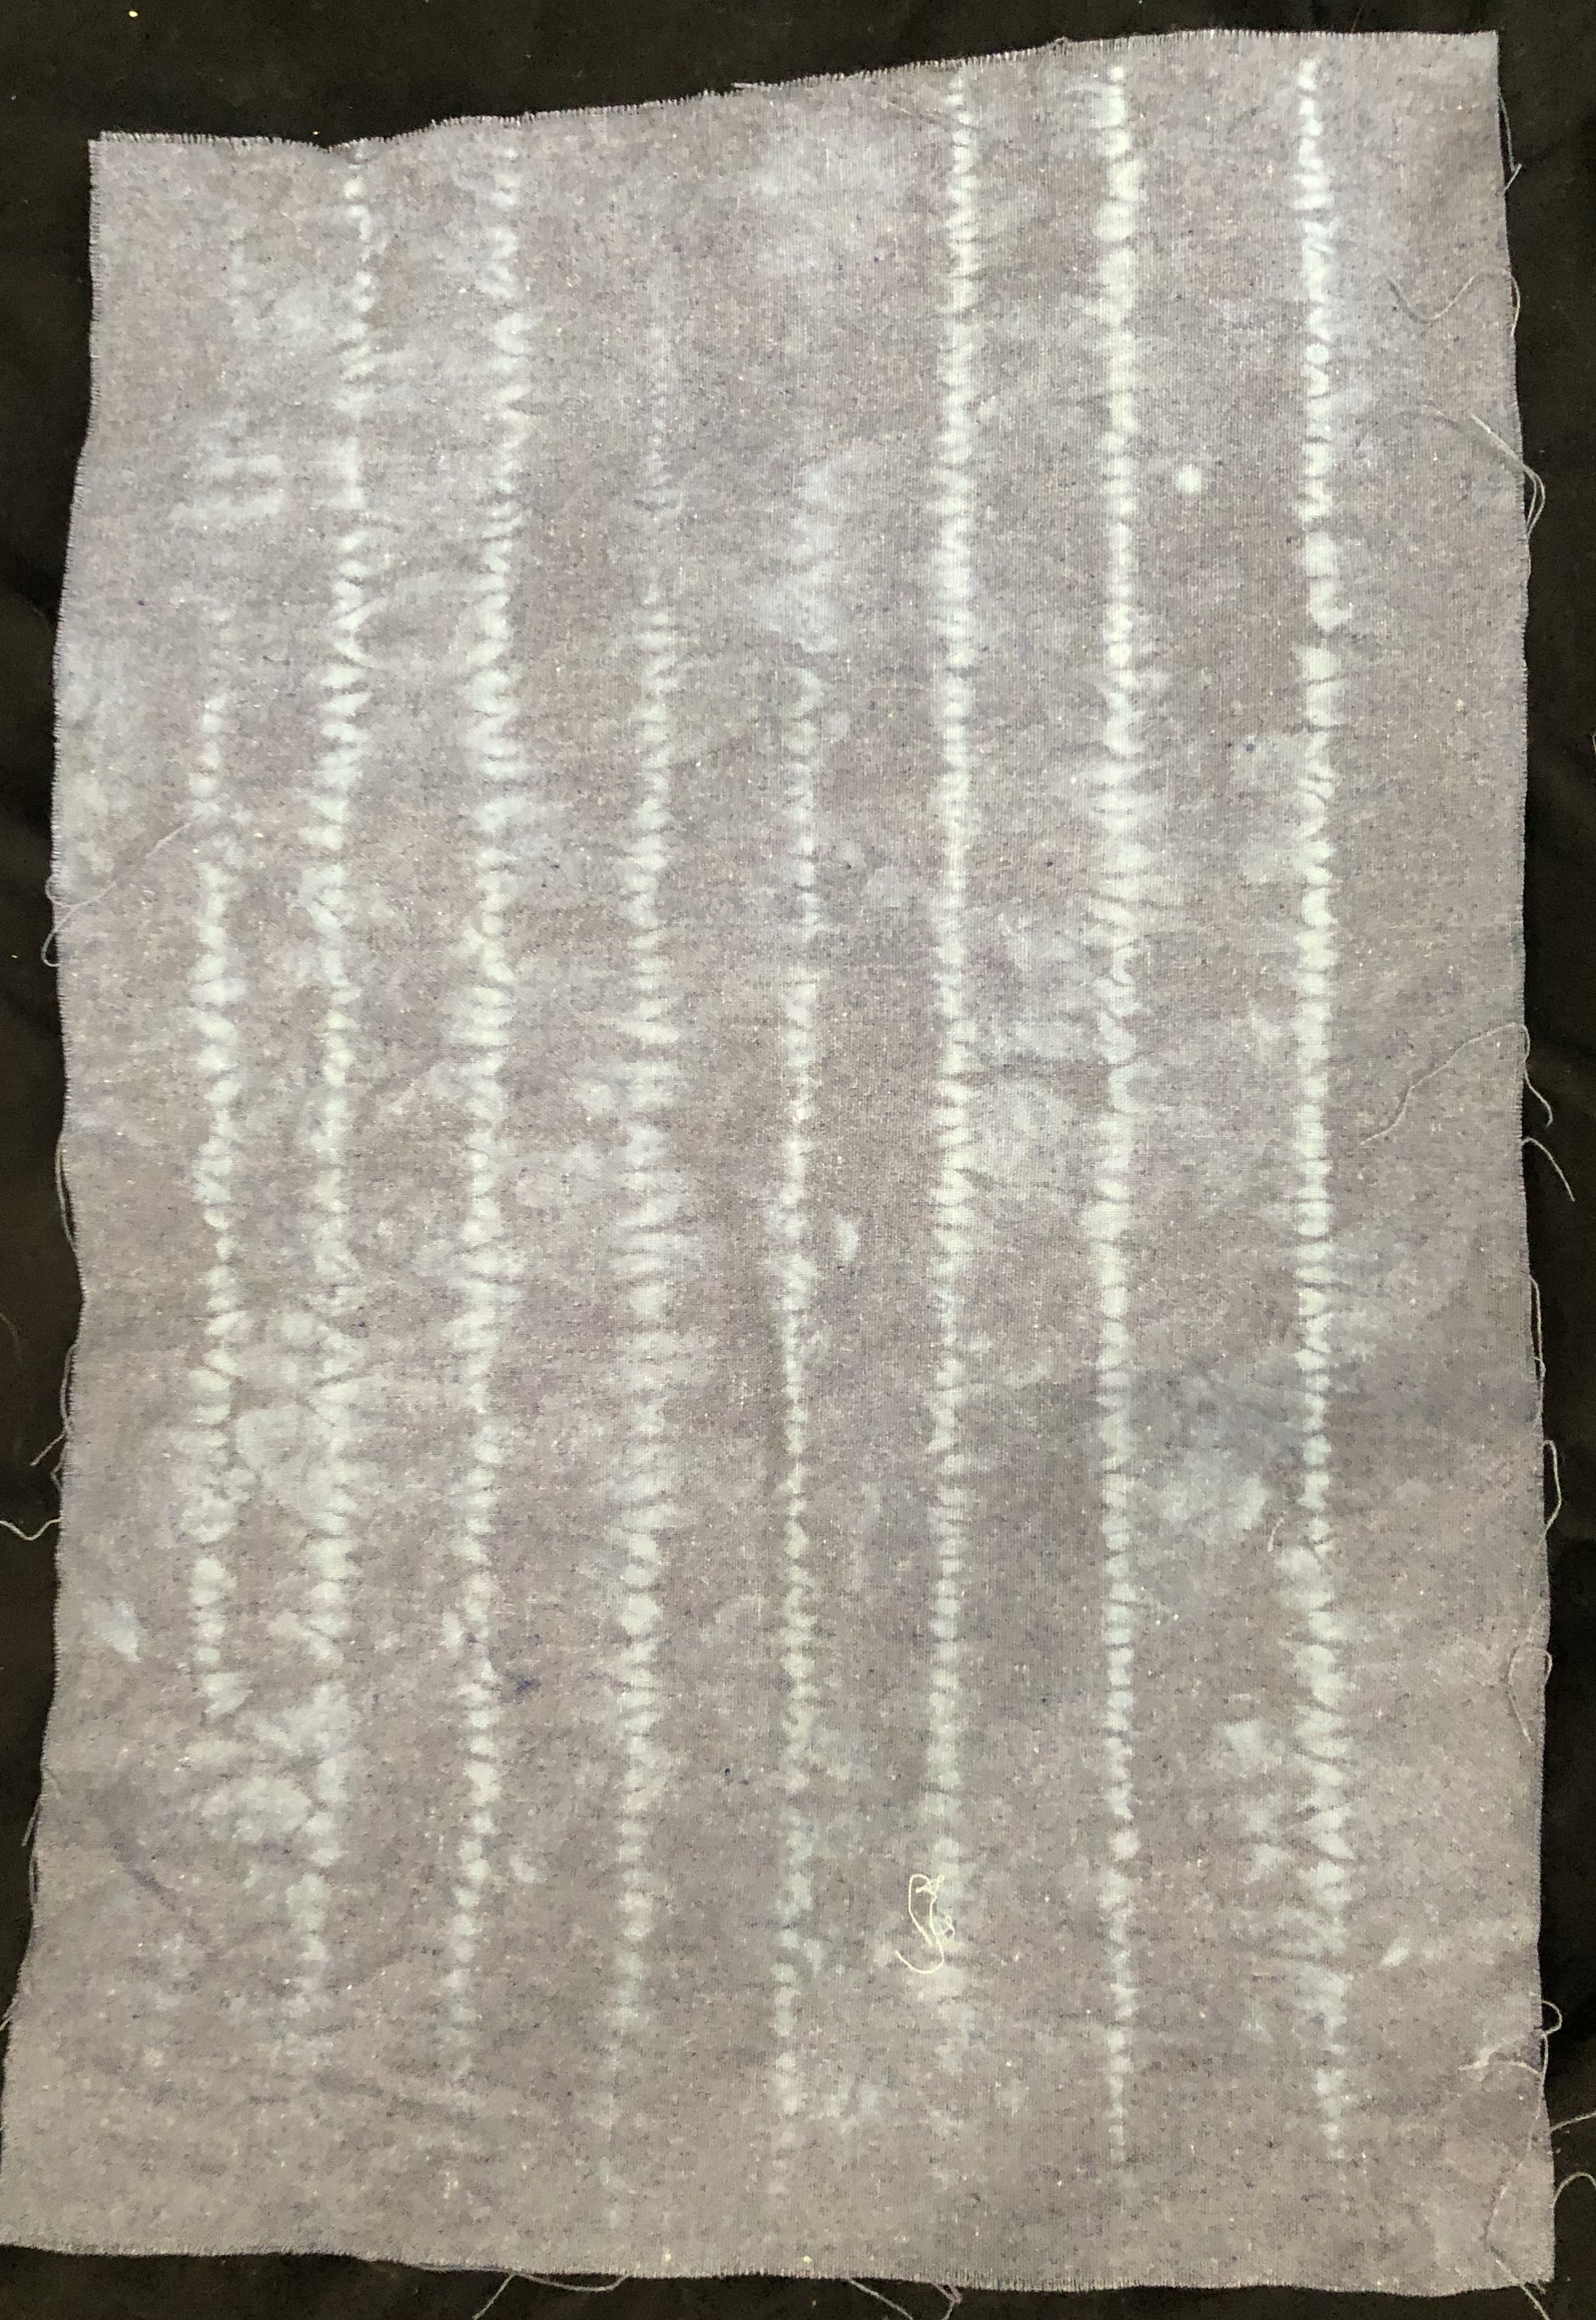
( The picture doe not show the true colour of the dyed fabric) These are the final results. I have decided to use the first second and third piece as part of my FMP. The reason for this being is I prefer the outcome for these but also I feel as though they fit better together. The whole reason I created 5 different ones in the first place was to make sure I was going to have three that I was completely happy with placing in my FMP.
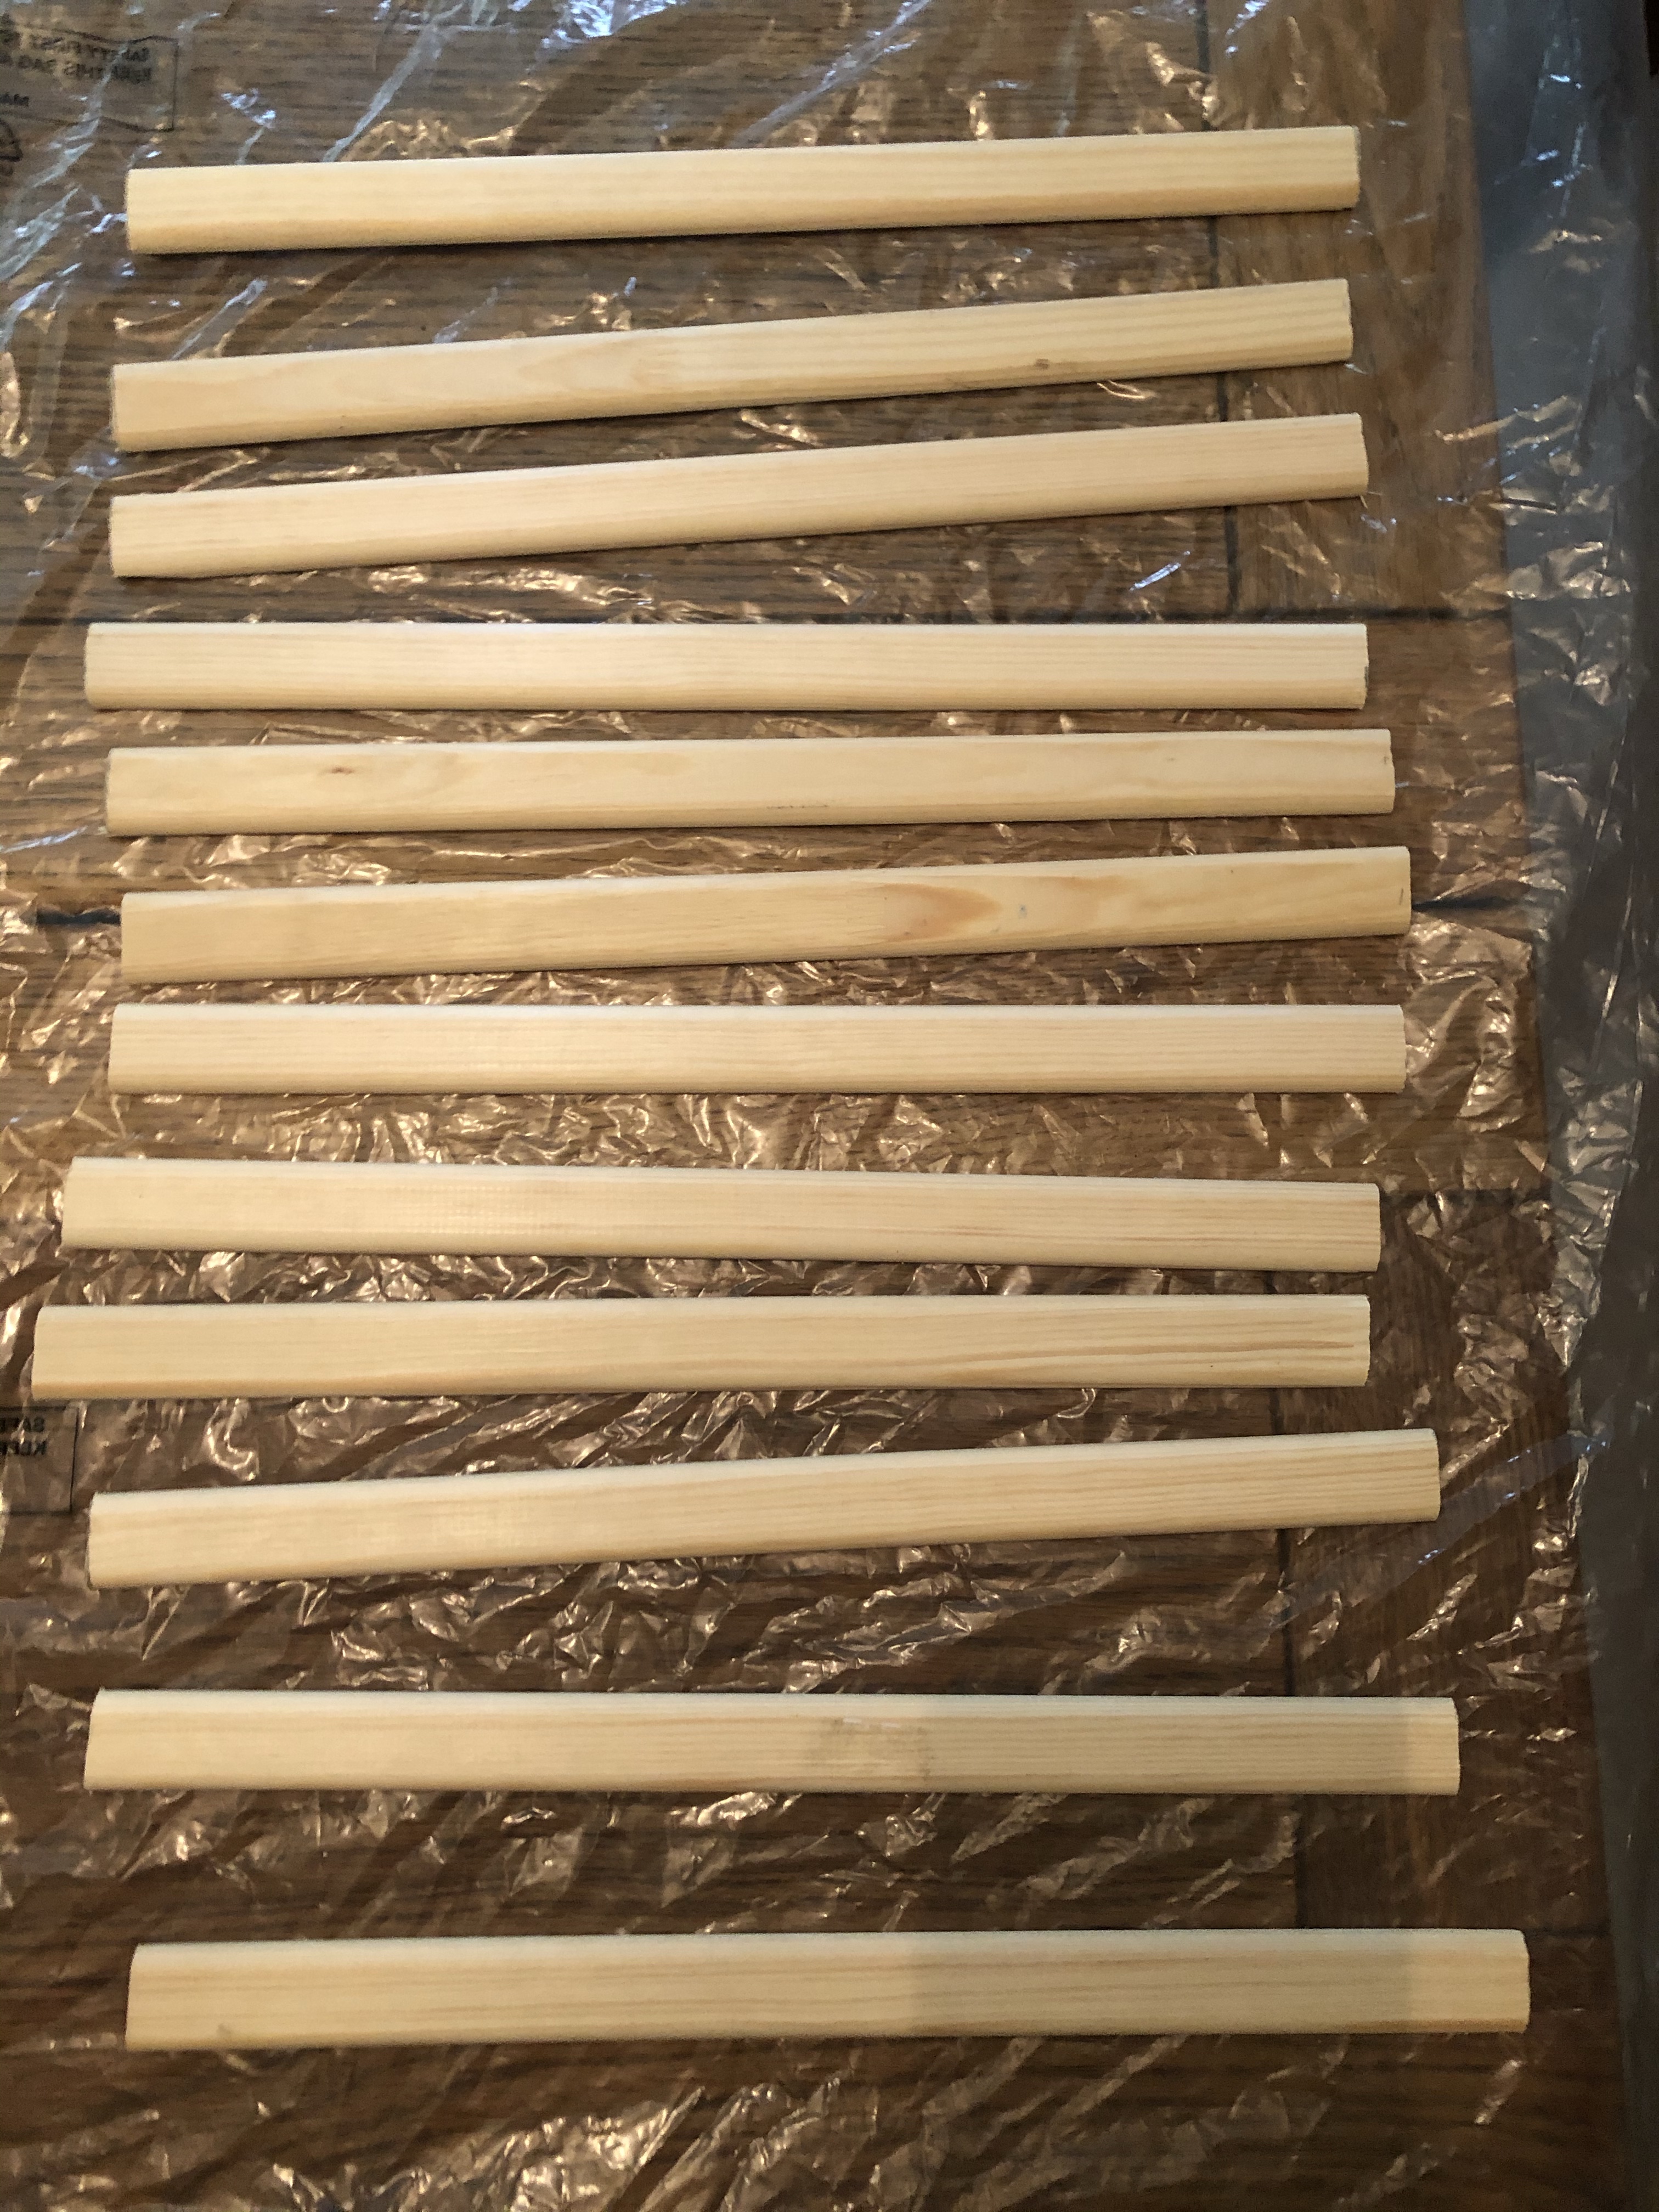
The next step for me was to cut strips of wood to frame the shibori dyed fabric as a scroll. I picked up these strips from Stermat and cut them down to the length of 35cm. I wanted them to leave about 2cm of space on either side of the fabric as the fabric is 31cm. I wanted to stain the wood with varnish however the varnish i had in the house wasn’t dark enough. Then I tried brown shoe polish but it showed up with quite a red undertone. Then I decided to use watered down acrylic and was extremely happy with the outcome.
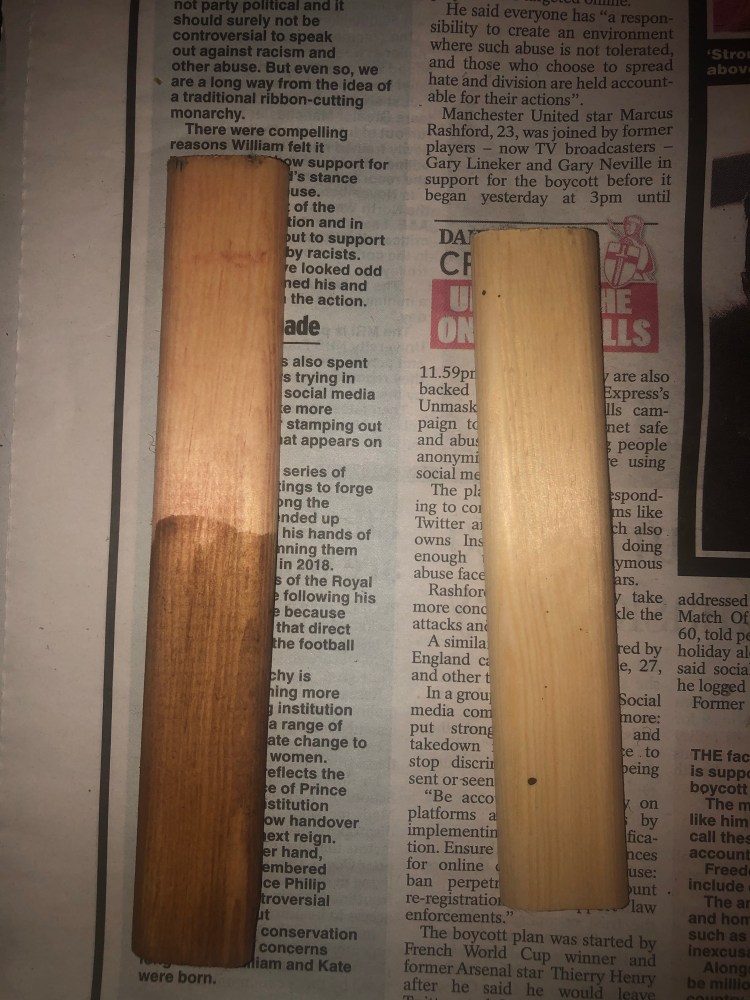
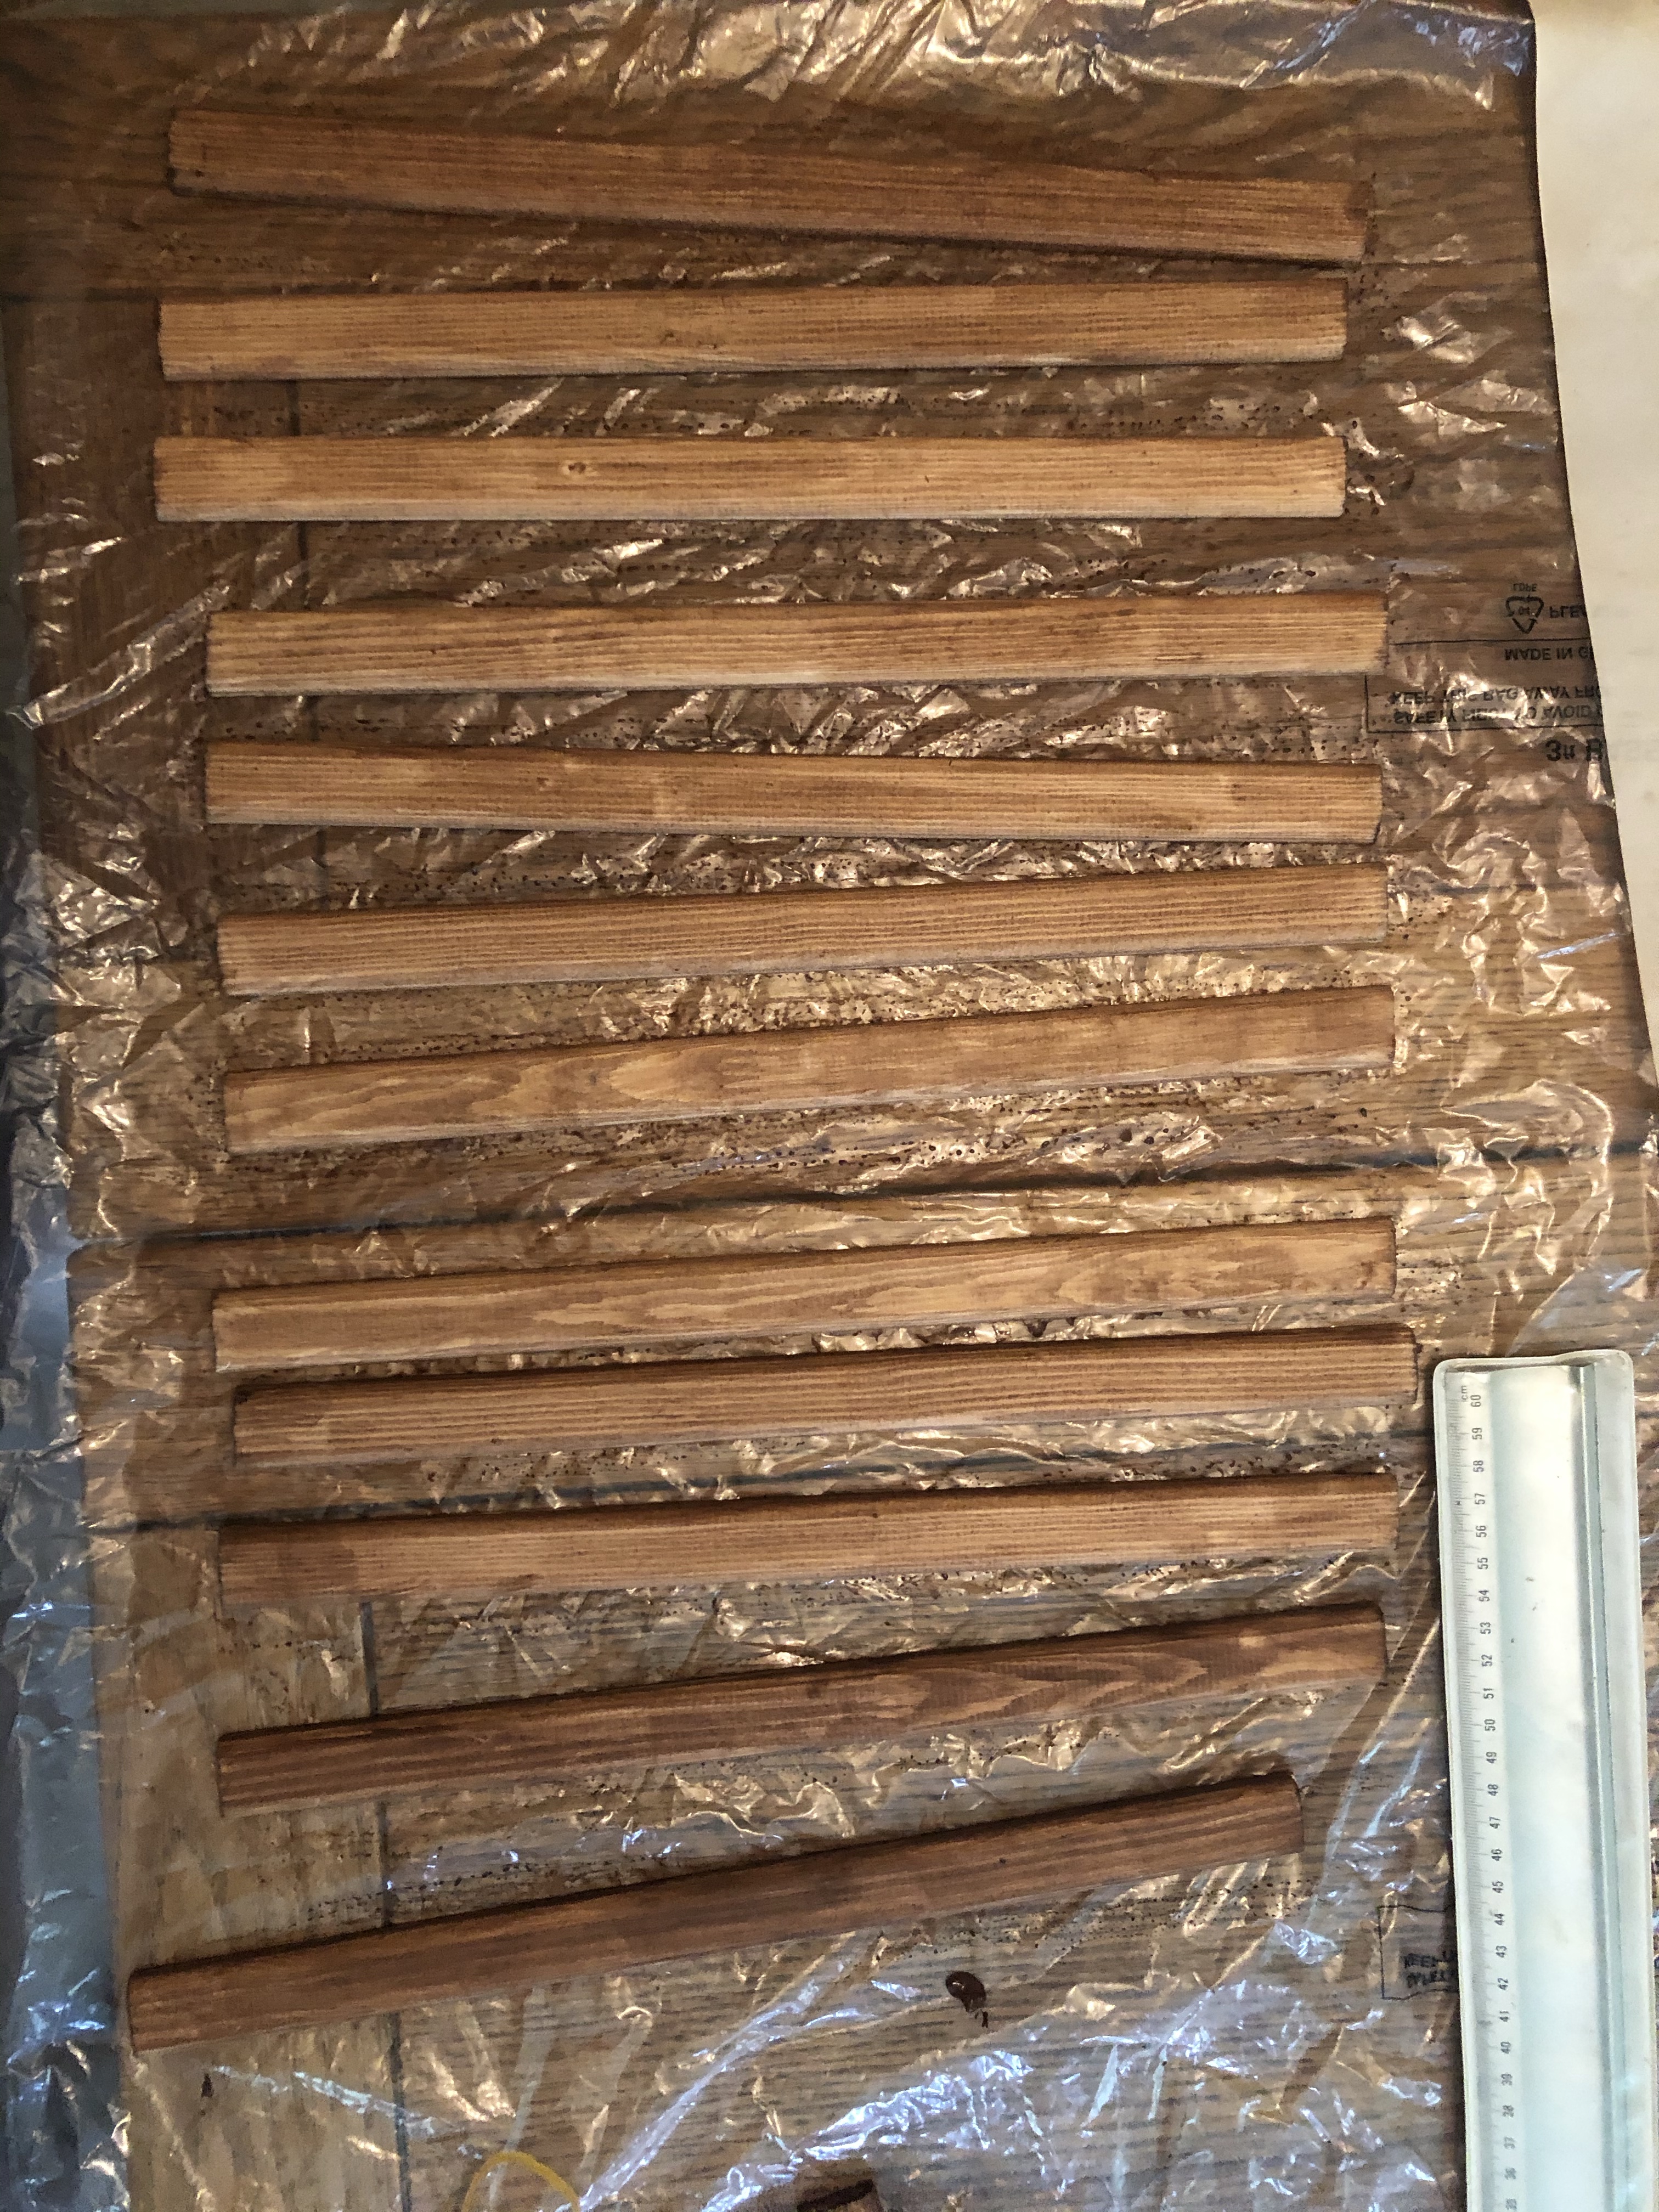
These are a before and after of the wood pieces which have been painted with watered down acrylic and then varnished with some clear wax to give it a shine.
